Prepare a return url
Back to the merchant site
After his payment, the customer will be redirected to the url you submitted in the return_url variable defined at payment initialization. The return link/url (return_url) is called by DV PASS to send the customer back to your site. This url must be available to receive HTTP requests of type GET and POST.
DV PASS adds in parameter the token and transaction_id which allows you to identify for which customer the return is done, you can then display a message to your users after their payment to inform them if their payment is successful or not, this is possible since you have the status of the transaction via your notification url (see previous chapter)
{primary.fa-close} No processing in your database should be done on the return url, it should only be used for redirections.
STEPS TO CONFIGURE THE RETURN URL
-
After a payment, your customer is invited to return to your site regardless of the outcome of the transaction. When the customer clicks on the back button, DV PASS executes a POST type request on your notification url containing:
- token: the payment_token generated during initialization.
- transaction_id : the transaction_id variable you sent at initialization
-
After obtaining it, you should check your database or contact Checking a transaction to DV PASS to know the status of the payment.
-
Write the client to the desired page
note
TEST YOUR RETURN URL
After payment, you can test your return url using an http request application. For the example, we will use PostMan.
Available GET
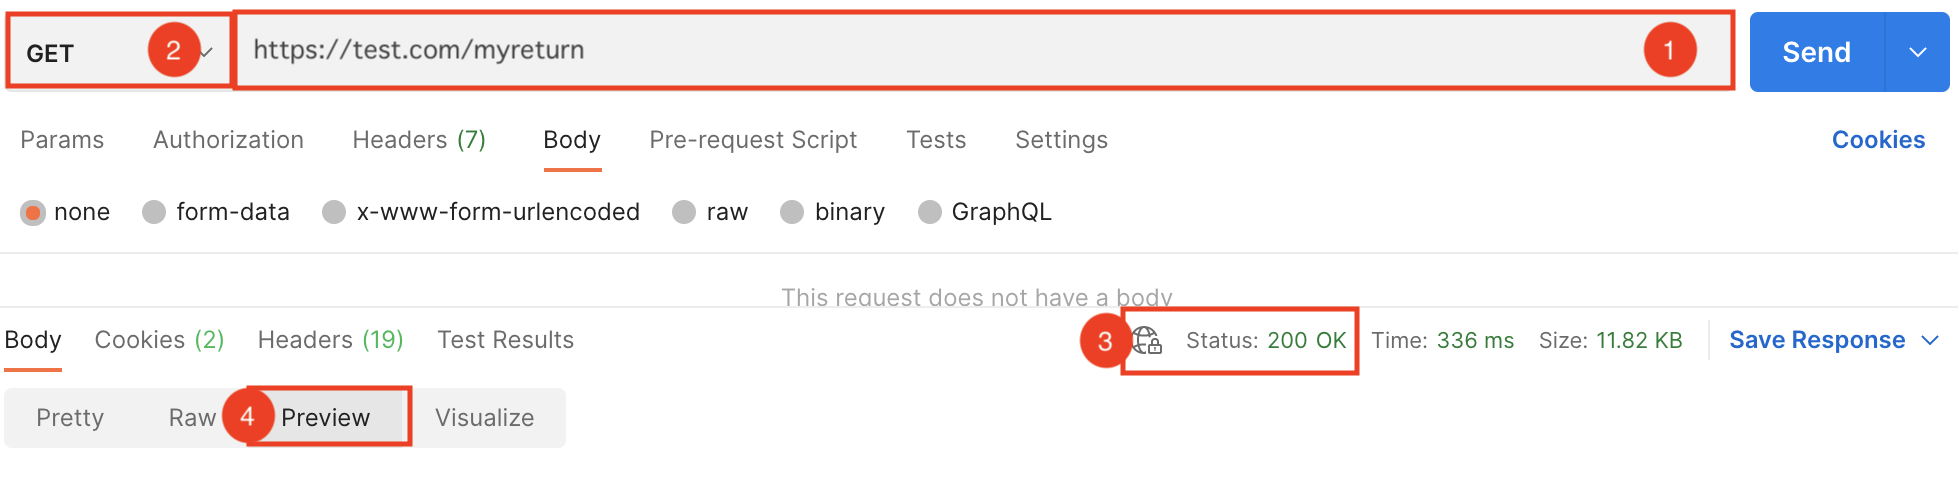
1) Enter your notification url
2) Select the GET method, then click on "Send
3) You should receive Status 200 OK(If this is not the case, you will find the cause here )
4) Select "preview" to view page
Available POST
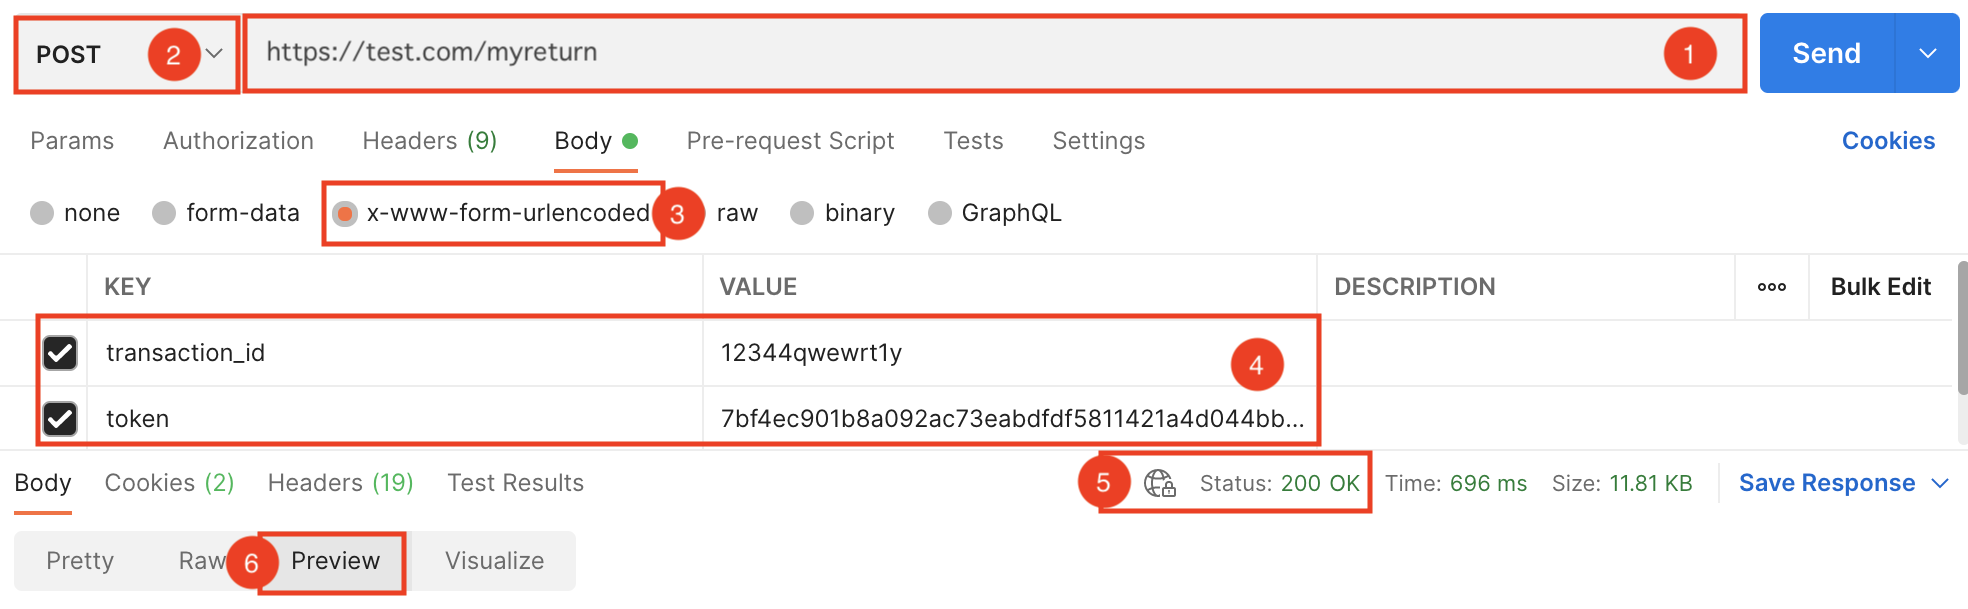
1) Enter your notification url
2) Select the POST method
3) Select the content-type x-www-form-urlencoded
4) Enter transaction_id and token with their respective values, then click on "Send".
5) You should receive Status 200 OK(If this is not the case, you will find the cause here )
4) Select "preview" to view page
NOTE
Some technologies require the user to log in again when they return to your platform.
To avoid this, use themetadata variable at initialization to pass session information.